
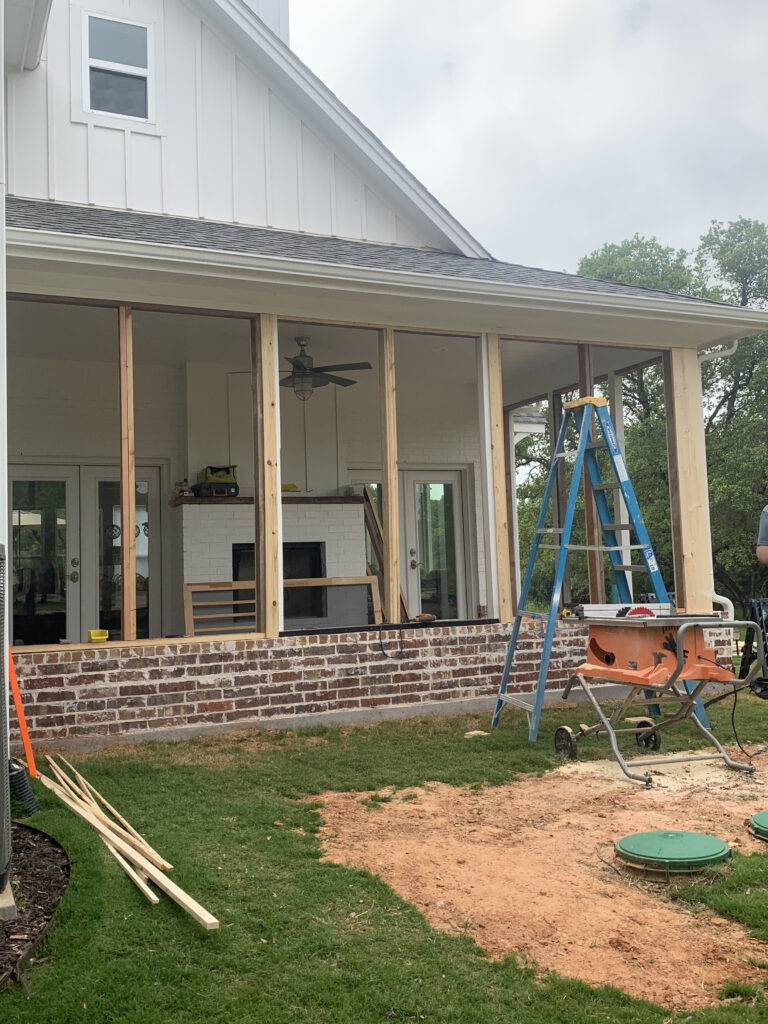
It was always the plan for this area to be a screened porch, but with time a budget constraints we just didn’t get to it during the construction of the house.
Mosquitoes around here are no joke.
I’ve seen some mosquitoes that would give birds a run for their money in a fight.
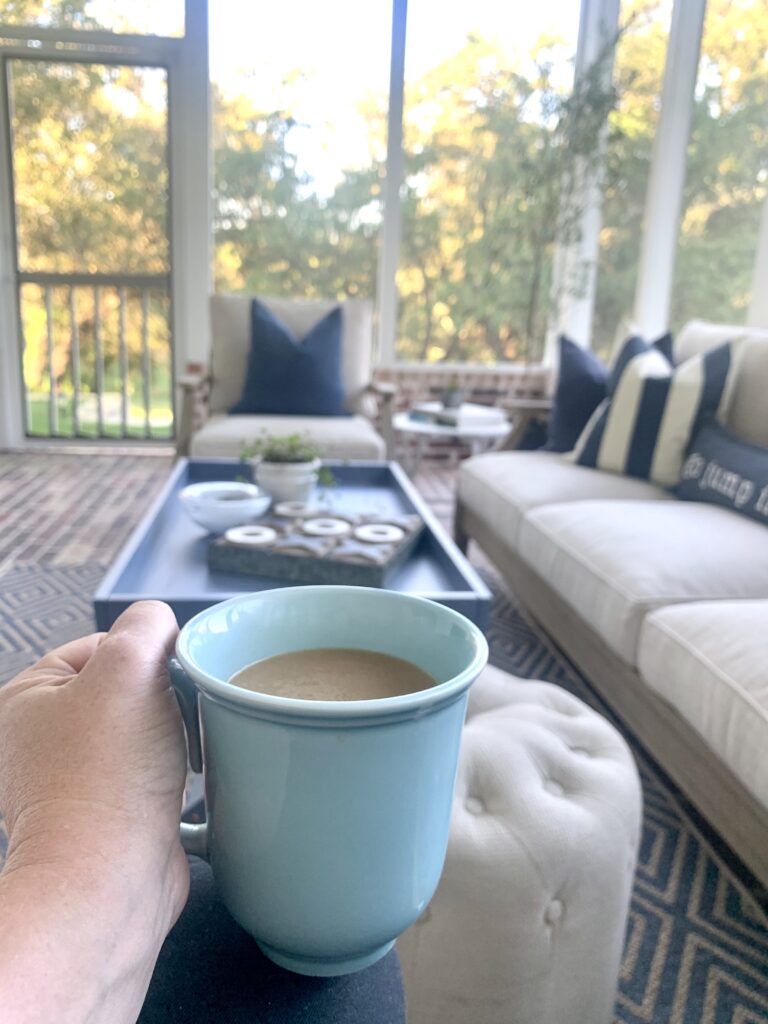
So, a screened porch is something we really wanted for nice mornings sipping coffee, and cool afternoons for a little quiet and fresh air.
The floor and roof were completed during construction, so we weren’t starting from nothing.
The following is a step by step of what we did to take this space from an open, covered porch to fully screened in.
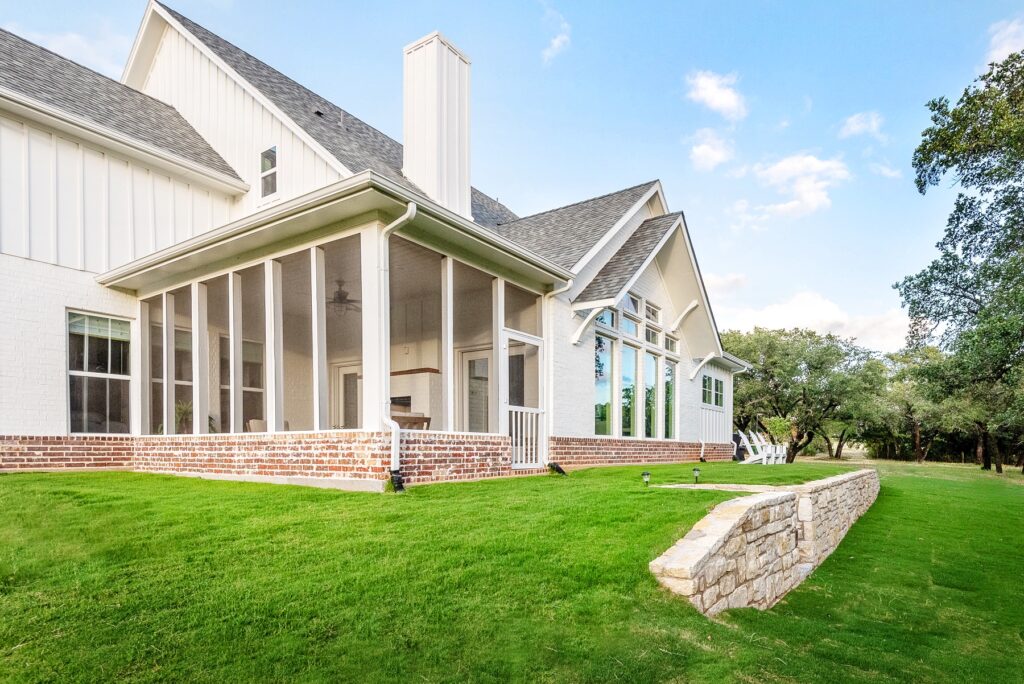
Our first step was to have our masonry guys build the little brick wall that goes around our porch and matches the existing water table on the house.
Then, it was our turn to get to work.
Before I get to the steps, let’s talk materials.
We used the Screen Tight system which can be found at both Lowes and Home Depot, and probably other hardware stores as well.
I’ve seen others just use a staple gun and some screen, but we wanted this to not look like a DIY and the Screen Tight system was so easy and affordable.
(This is not a sponsored post, but I am including affiliate links that help support my efforts to help others through this blog.)
Affiliate disclosure: Please note that some of the links within this site are affiliate links and I will earn a commission if you purchase through those links…which means that I can continue to bring you helpful content at no cost to you! I appreciate your support. Click here for full affiliate disclosure.
Materials:
- Vinyl screen (comes in 42″ width rolls 25′ long)
- Screen Tight Base (black receiver strip, comes in 1.5″ for 2x4s or 3.5″ for 4x4s)
- Round Spline (.175″ round spline)
- Spline Roller
- Screen Tight Cap (comes in white, gray, beige, or brown)
- Mallet
- Wood block
- Saw
- Scissors
- Screws
- Drill
- Snips
- Hammer, nails, and lumber if you need to do some framing
Step by Step instructions:
Step 1 Planning and Measuring:
Before doing anything else, we measured the space and our existing columns.
The screen comes in 42″ widths, and it needs some overlap with the base and cap.
We created a plan that would give us an even spacing between columns which would be about 40″ on one wall and the spaces worked out to be about 36″ on the other wall.
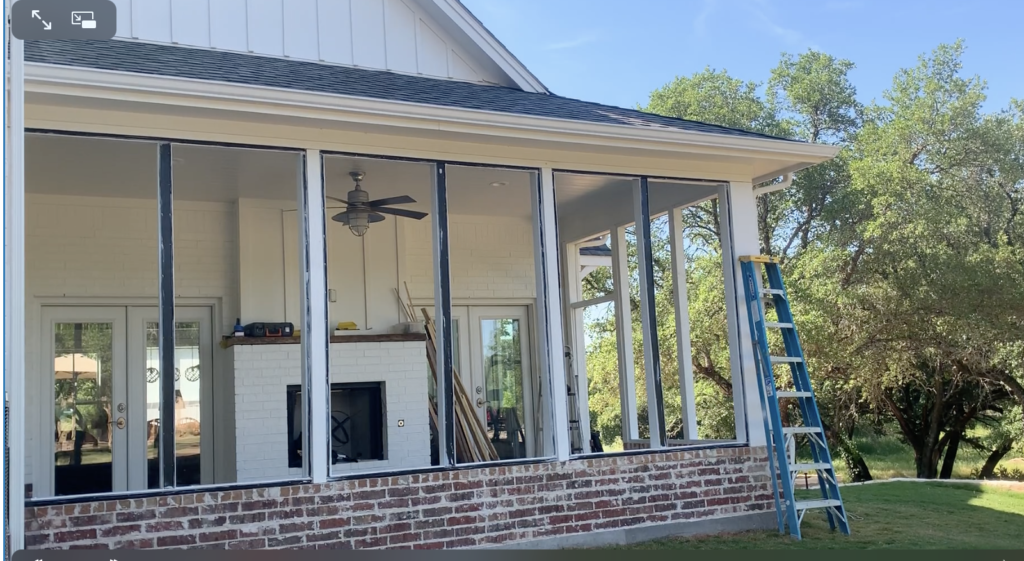
Step 2 Framing:
To get an even spacing, we would need to box out some columns to make them wider, and build some new columns as well.
We created a pattern with alternating thick columns, and smaller columns to support and receive the base.
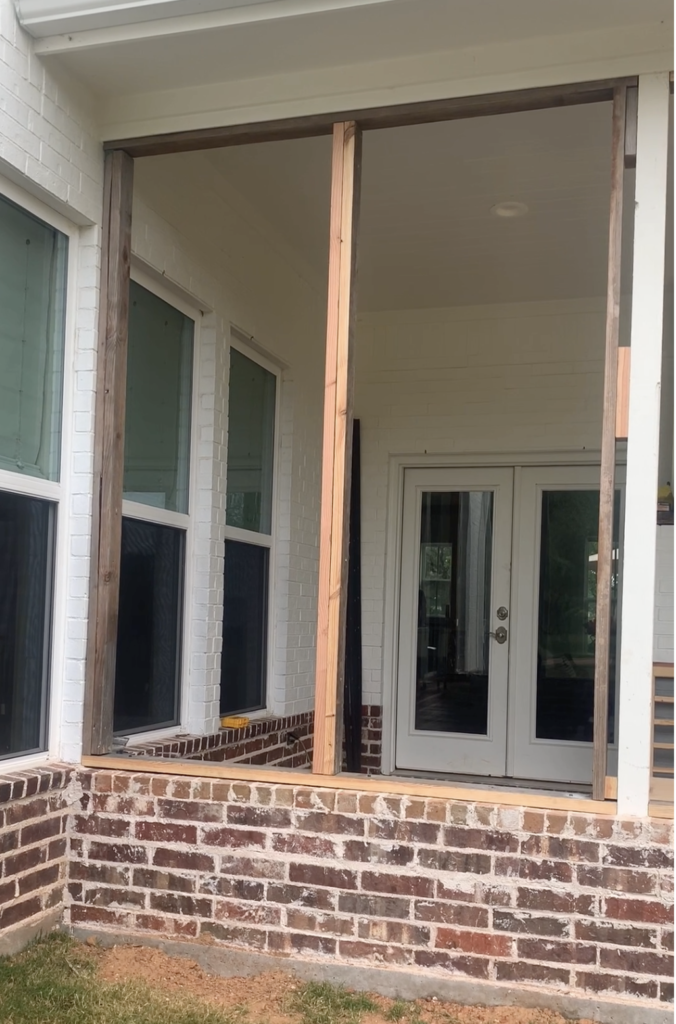
Step 3 Trim:
This step may not be necessary for you. Because we boxed out our columns to get even spacing, we needed to cover gaps and give our thicker columns a finished look, so we added trim.
We made sure to leave 1.5″ on each side where the Base would attach to the 2×4 (see the picture below).
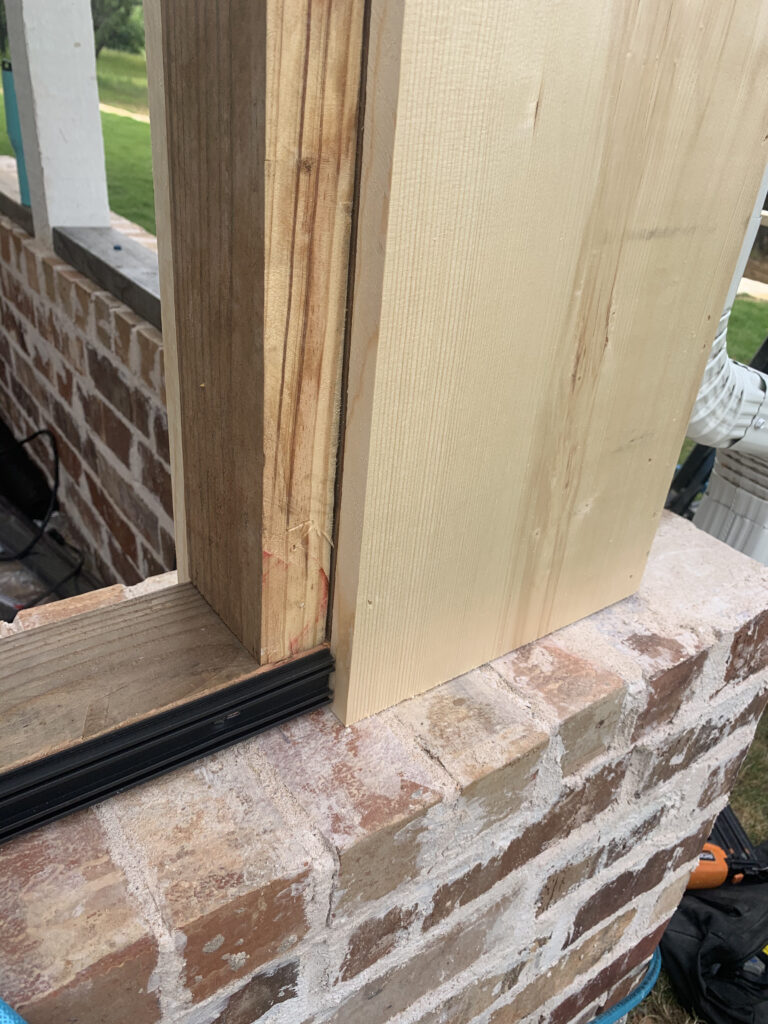
Step 4 Attach Base Strips
Screw in the base strips to all 4 sides around where each screen will go.
Put a screw into each hole in the strip.
There is no need to miter corners.
Use snips to cut to length.
Step 5 Paint
This is a good time to paint if you have wood exposed after adding the Base strips.
If you didn’t add trim and the base strips cover your wood, then go onto the next step.
Step 5 Add Screen:
Now it’s time to add the screen.
You’ll need a roll of screen, scissors, spline, and spline roller.
It helps to have 2 people for this step.
Start at the top edge and overlay the screen over the base strip, extending at least 1/2″ past the groove.
Lay the spline over the screen and roll it into the groove using the spline roller tool .
Stretch the spline as you roll.
Do the same to the sides, then bottom.
Pull the screen as you go to make sure the screen is tight.
If you get kinks or bunching up in your screen, pull out the spline and try again, pulling the screen taut as you go.
Cut excess screen.
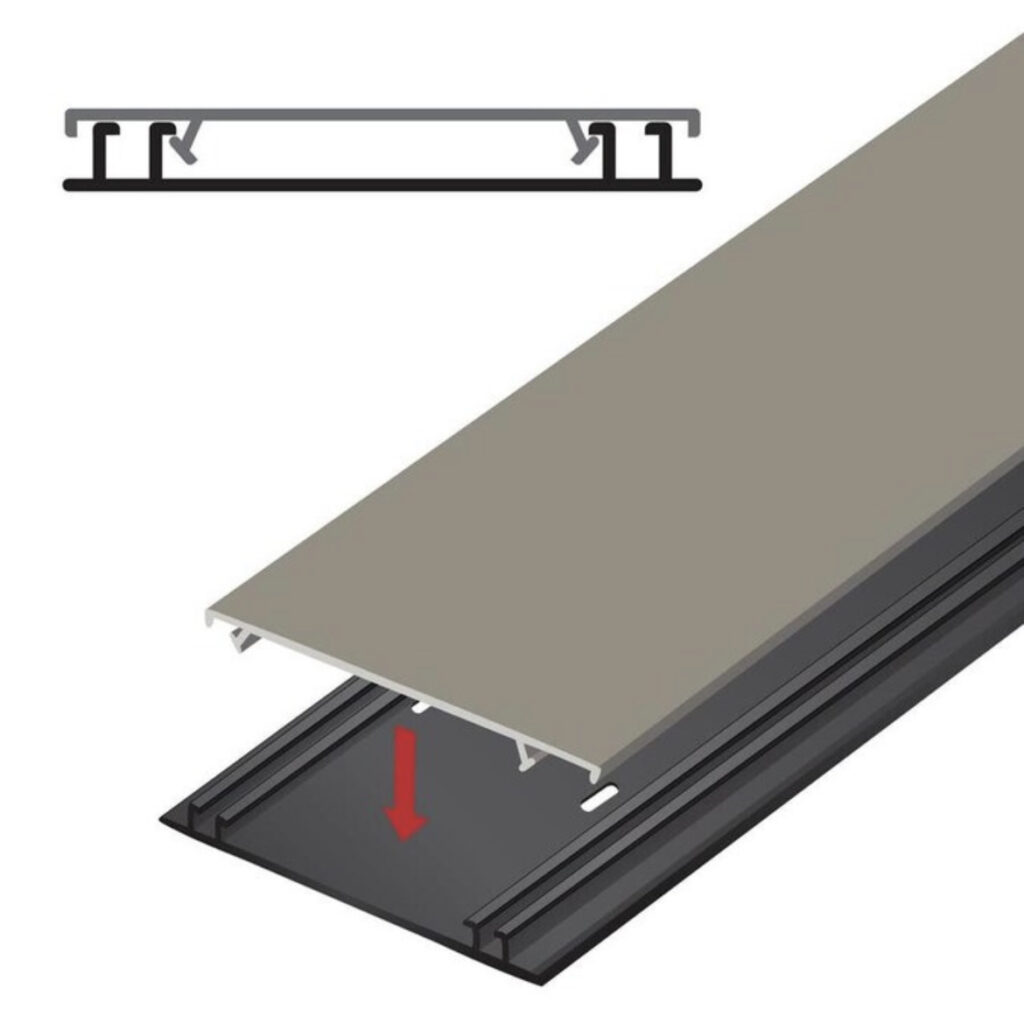
Step 6 Snap on Caps
Cover the screen base assembly with the smooth caps by snapping them onto the base.
Use a mallet and a wood block to snap the caps on.
Snips will work well to cut the excess length.
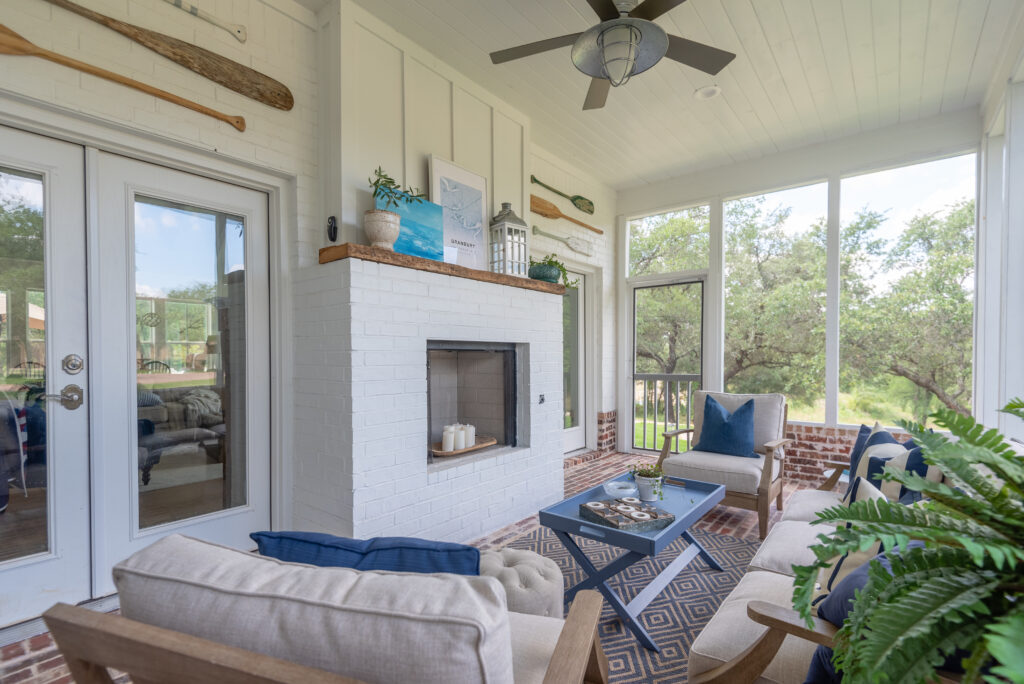
And now the screened porch is complete and ready for enjoying!
Check out his post to help you decorate it. Give your Outdoor Space Vacation Vibes


0 Comments